
Goal: this guide shows you how to connect your piano to a computer simply, reliably, and affordably.
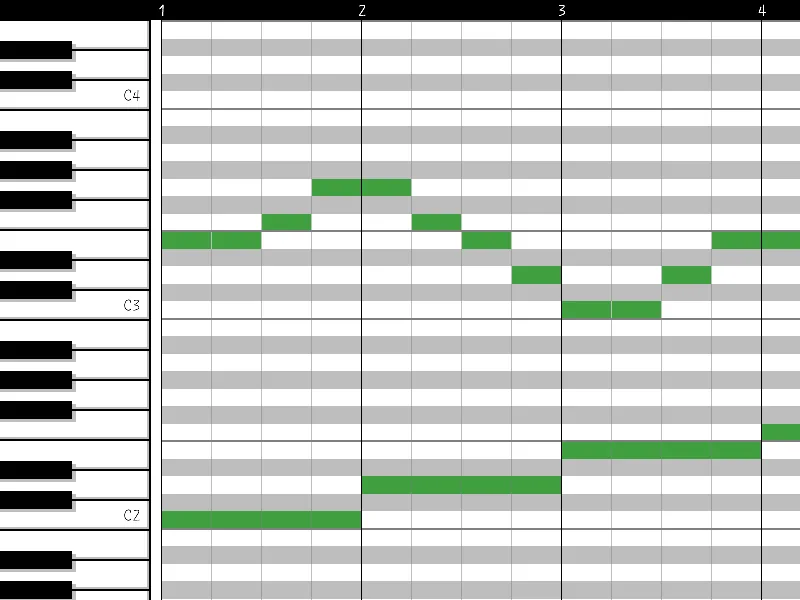
The MIDI protocol transmits performance data: notes, velocity, duration, modulation, and sustain pedal information. It does not carry the audio itself, but instructions for software or a synthesizer.
There are three main methods: a direct USB connection (USB-B to USB-A or USB-C), MIDI DIN through a USB interface, and Bluetooth MIDI. Each option requires a cable, port, or interface, and sometimes a driver.
Once connected, you can record in a DAW, edit your takes, use sound libraries, and access learning apps. Often, all you need is one USB cable, or an interface if your instrument has only DIN sockets.
Tip for a reliable connection: choose quality cables, avoid unpowered hubs, and install drivers if needed. For more details about USB-B sockets and supported operating systems, consult the manufacturer’s page.
Check the latest support information and
compatibility.
Connecting your keyboard to a computer opens up new creative and learning possibilities.
Recording in a DAW lets you edit your playing note by note: correct pitch, duration, velocity, and tempo without playing everything again.
Recorded MIDI data can be sent back to the instrument for playback or converted into printable sheet music.
- Non-destructive recording: correct timing and dynamics after a take while preserving the original.
- Creativity: change sounds (piano, strings, synthesizer) with VSTs without replaying your performance.
- Faster learning: loop a passage, slow playback, and practice each hand separately.
- Notation: export your MIDI data to notation software to preserve or share your ideas.
- Apps and DAWs: Flowkey, Skoove, GarageBand, FL Studio, and Ableton use MIDI to track progress and provide interactive exercises.
Even a beginner can improve and stay motivated with a simple setup. Connecting to a computer turns your piano into a recording and learning workspace.
Identify the ports on your digital piano and computer
First, identify the available sockets clearly.
On the back of the keyboard, look for the USB-B port, often labeled “USB-to-Host.” It is taller than it is wide and generally transmits MIDI data. Your computer will have either a conventional USB port (USB-A) or, on newer models, a USB-C port.
The five-pin MIDI DIN connector is round in shape and has five visible pins. Its sockets are labeled IN and OUT: IN receives data, while OUT sends it. Check these labels before connecting anything to avoid reversing the connections.

- Some pianos have a USB-A port for flash drives used to save recordings; it does not always support MIDI.
- Some models have both USB-B and DIN ports, offering more flexibility.
- Bluetooth MIDI may be built in or added with an adapter, such as the Yamaha MD-BT01, connected to the DIN sockets.
| Port type | Where to find it | Common use |
|---|---|---|
| USB-B (USB-to-Host) | On the back of the keyboard | Sending and receiving MIDI data with the computer |
| USB-A | On the computer and sometimes the keyboard | Flash drive for backups; not always MIDI-compatible |
| Five-pin MIDI DIN | On older or professional models | IN and OUT sockets for MIDI data |
| Bluetooth MIDI | Built in or added with an adapter | Wireless connection, depending on device compatibility |
Tip: list the sockets on your piano and computer before buying cables or adapters. This prevents unnecessary spending and makes the connection easier.
How to connect a digital piano to a computer
Connecting your keyboard to a computer often requires just one cable and a few quick checks.
Simple setup: USB-B to USB-A or USB-C cable
The most direct method: connect the keyboard’s USB-to-Host port to the computer with a USB-A to USB-B cable. For newer Macs, use a USB-C to USB-B cable.
Choose a reliable cable, such as an Amazon Basics USB 2.0 A-B cable, and avoid extensions. Short cables help limit latency and reduce the risk of disconnection.
DIN setup: MIDI-to-USB interface with crossed IN and OUT connections
If the keyboard has no USB-B port, use a MIDI-to-USB interface, such as an iConnectivity mio.
Connect the keyboard’s OUT socket to the interface’s IN socket, then the keyboard’s IN socket to the interface’s OUT socket. These crossed connections are necessary: MIDI data leaves the instrument and enters the interface, then returns to the instrument for commands or playback.
“Make sure your system recognizes the interface; it usually appears as a MIDI device in your DAW.”
- Avoid unpowered USB hubs to keep the connection and power supply stable.
- Keep cables short and check that connectors are fully inserted.
- Have a USB-C to USB-A adapter ready if your computer has only USB-C ports.
| Situation | Recommended equipment | Practical note |
|---|---|---|
| PC with USB-A | USB-A → USB-B cable | Direct connection; often no driver is needed |
| Newer Mac with USB-C | USB-C → USB-B cable or adapter | Prefer a direct cable for a reliable connection |
| Older keyboard with DIN sockets | MIDI → USB interface (for example, iConnectivity) | OUT → IN and IN → OUT connections are required |
For more practical details, read our step-by-step guide to connecting a digital piano to a computer.
Connecting via USB: the most direct route
A USB connection provides a simple, reliable setup for most users. Once connected, you can control virtual instruments and record in a DAW.

Windows PC with a USB-A port
On a PC, a USB-A to USB-B cable is usually enough. Connect the computer’s USB port to the instrument’s USB-to-Host socket.
Most systems detect the instrument immediately. Open your software and check that it receives notes.
Newer Macs with USB-C ports only
For newer Macs (2016 and later), prefer a direct USB-C to USB-B cable over several connected adapters.
A good cable reduces connection problems and latency. If you need an adapter, choose a reliable one.
When to install the manufacturer’s driver
Most pianos are plug and play. However, some manufacturers, including Yamaha, provide drivers to improve stability and MIDI timing.
“Always download drivers from the official website and restart the computer after installing them.”
| Setup | Recommended equipment | Note |
|---|---|---|
| PC with USB-A | USB-A → USB-B cable | Plug and play; check the connection in your DAW |
| Mac with USB-C | USB-C → USB-B cable | Avoid using multiple adapters |
| Keyboard without a USB port | MIDI → USB interface | Enables connection through DIN sockets |
MIDI to USB: when your piano has DIN sockets
If the instrument has no USB-to-Host port, the usual solution is an interface that converts the MIDI DIN signal into data transmitted over USB.
What a MIDI-to-USB interface does: it converts a signal from a five-pin MIDI DIN connection into a USB MIDI data stream that the computer can read.
Correct connections: connect the piano’s MIDI OUT to the interface’s IN, then the piano’s MIDI IN to the interface’s OUT. Finally, connect the interface to a USB port on the computer.
Choose a reliable model such as the iConnectivity mio, and avoid unshielded interfaces. Some mobile options, such as the iRig MIDI 2, add iOS connections for greater flexibility.
Tip for a reliable connection: do not use an unpowered USB hub. Connect the interface directly to a stable port to prevent disconnections.
“Test the connection immediately in a DAW or MIDI monitor to confirm that notes and controller messages are being received.”
Keep the cable short, avoid loops, and limit interference. This method remains ideal for older or professional pianos without built-in USB MIDI.
Wireless connection: enable Bluetooth MIDI
Bluetooth makes portable use and practice easier without cluttering your space.
First, check whether your digital piano and device support Bluetooth MIDI. Look for “Bluetooth MIDI” in the keyboard specifications or its network or USB menu. If it is not built in, an adapter can add it.

One common option, the Yamaha MD-BT01, plugs into the MIDI IN and OUT sockets and adds a wireless connection without modifying the instrument. Plug the adapter into the DIN sockets, then pair it in the MIDI settings of your system, app, or DAW.
- Test note reception in your software to check the connection.
- Keep the adapter away from sources of interference, such as routers and microwave ovens.
- Update the firmware and follow the documentation if a dedicated app is required.
“Wireless removes cables and gives you more mobility, but test it before any use where reliability is essential.”
Practical tip: prefer USB when recording with low latency. Use Bluetooth for practice, learning, or portable setups, and keep a backup cable if needed.
Connect a digital piano to an iPad or Android smartphone
Using a tablet or smartphone with your keyboard offers convenient options for creating music and practicing.
iOS and iPadOS: the most reliable method is a Lightning to USB Camera adapter (Apple Camera Adapter) and a USB-A → USB-B cable between the keyboard and iPad.
A more compact option is a direct Lightning → USB-B cable, though it is often less robust and may cause detection problems.
Android: for USB-C devices, choose an OTG adapter (female USB-A to USB-C) with a USB-A → USB-B cable, or a direct USB-C → USB-B cable if the device supports it.
For devices with a micro-USB port, use a micro-USB OTG adapter and a USB-A → USB-B cable; direct micro-USB → USB-B cables are rare and fragile.

- Power: a powered adapter improves stability during long sessions.
- Test detection in GarageBand or FL Studio Mobile and check USB and MIDI permissions.
- Dedicated interfaces, such as the iRig MIDI 2, offer a more reliable mobile option.
| Platform | Recommended solution | Advantage |
|---|---|---|
| iPad or iPhone | Lightning to USB Camera adapter and USB-A → USB-B cable | High compatibility and stability |
| USB-C Android | OTG adapter (USB-A → USB-C) and USB-A → USB-B cable, or direct USB-C → USB-B cable | Simplicity or compactness, depending on the cable |
| Micro-USB Android | Micro-USB OTG adapter and USB-A → USB-B cable | A reliable solution despite the scarcity of direct cables |
Test the MIDI signal and troubleshoot connections
After connecting everything, check MIDI data transmission in software. Open a DAW (GarageBand or FL Studio) or an online MIDI monitor. Create an instrument track and select your device as its input. Play a few notes and press the pedal to confirm that messages are being received.
Common causes
- The keyboard’s USB-A port is not intended for MIDI.
- The MIDI DIN cables are reversed: an OUT → IN connection is required.
- The wrong device is selected in the software.
Quick fixes
- Try another USB port on the computer and avoid unpowered hubs.
- Disconnect and reconnect the cable, then restart the DAW and computer.
- Replace a suspect cable with a short, shielded one.
- Install or update the manufacturer’s driver if detection is inconsistent.
- For Bluetooth MIDI, check pairing, reduce interference, and try connecting in the app again.
“Quick test example: connect the keyboard, open GarageBand, create an instrument track, play a few notes, and check the level and latency.”
Go further: software, VSTs, and an audio interface for a small home studio
A good setup combines a DAW, plugins, and sometimes an interface. The DAW brings MIDI recording, editing, virtual instruments, and exporting together.
Set up your DAW
Select the MIDI input, create an instrument track, and enable monitoring. Logic Pro X, Ableton Live, Cubase, FL Studio, GarageBand, Pro Tools, and Digital Performer are established choices.
Adjust the buffer size to reduce latency when playing in real time.
Play VSTs with the keyboard
Install sound libraries such as Pianoteq, Keyscape, Kontakt, Omnisphere, or EastWest Pianos for expressive sounds. A lightweight host, such as MainStage or Kushview Elements, is enough if you are not mixing.
Audio interface: when to add one
Add an interface to record microphones, guitars, or line outputs. The quality of the analog-to-digital and digital-to-analog converters directly affects sound fidelity.
An interface that combines audio and MIDI simplifies connections and reduces the number of separate devices.
“Practical example: a piano connected by USB for MIDI, a DAW, headphones, and an audio interface if you are recording analog sound.”
To choose your equipment, read our guide to home studio equipment, which explains the types of gear and what an effective small studio needs.
Conclusion
This overview covers the common options and good practices for a stable connection between your instrument and computer. The simplest method is a USB-B to USB-A or USB-C connection: one cable is enough to control VSTs and record.
For models with DIN sockets, choose a MIDI-to-USB interface and connect OUT → IN and IN → OUT. Bluetooth MIDI through an adapter offers more mobility, but keep a backup cable for situations where low latency matters.
On mobile devices, choose a Lightning or OTG adapter according to the port on your device. Avoid unpowered hubs, test the connection in a DAW, and install the manufacturer’s drivers if needed. To go further, learn how to record on a PC and make full use of your setup to create more music.